Getting Started
Install Agenistrator and configure your first LLM provider.
This guide walks you through installing Agenistrator and making your first chat interaction.
Installation
Download the Plugin
- Download agenistrator.zip from the download page
- Go to Plugins → Add New in your WordPress admin
- Click Upload Plugin
- Choose the downloaded ZIP file
- Click Install Now
- Click Activate
Verify Installation
After activation, you should see:
- A new Agenistrator menu in the admin sidebar
- A chat icon in the bottom-right corner of every admin page
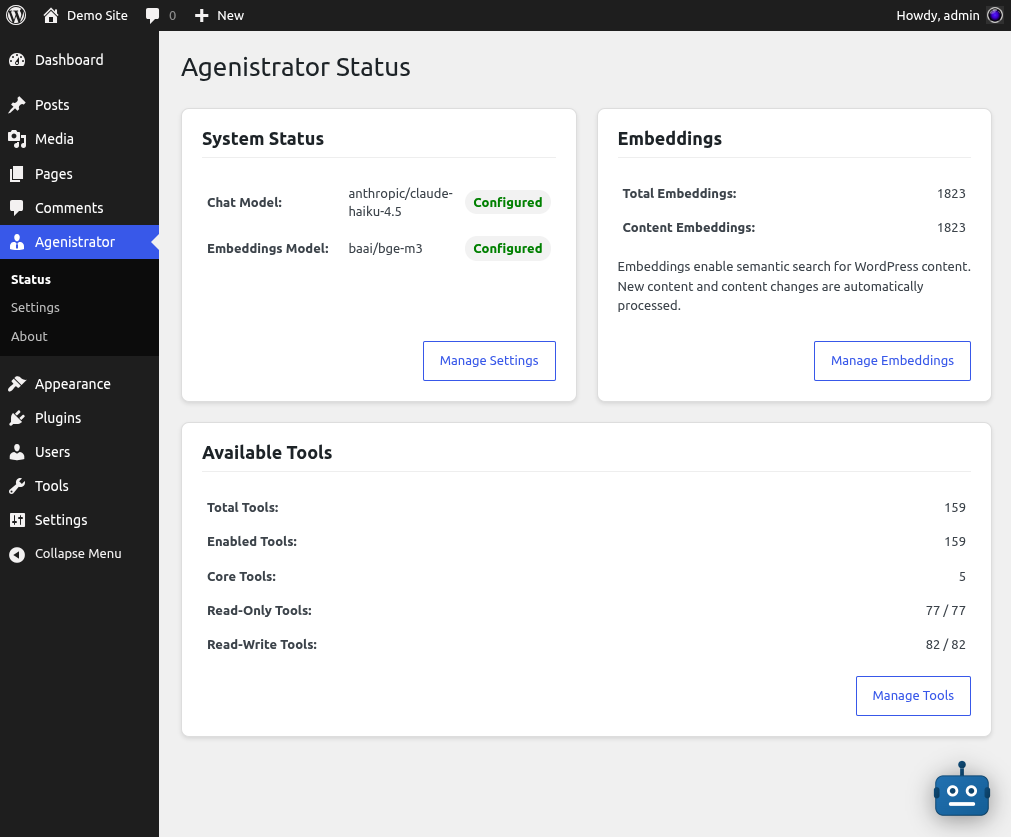
Status dashboard showing configured LLM models, embeddings count, and available tools overview
Configure an LLM Provider
Agenistrator requires an API key from at least one LLM provider to function.
- Go to Agenistrator → Settings
- Click Add Provider
- Select your provider type:
- OpenRouter - Access to 100+ models (recommended)
- Anthropic - Claude models
- OpenAI - GPT models
- Enter a name for this provider (e.g., “My OpenAI Account”)
- Paste your API key
- Click Save
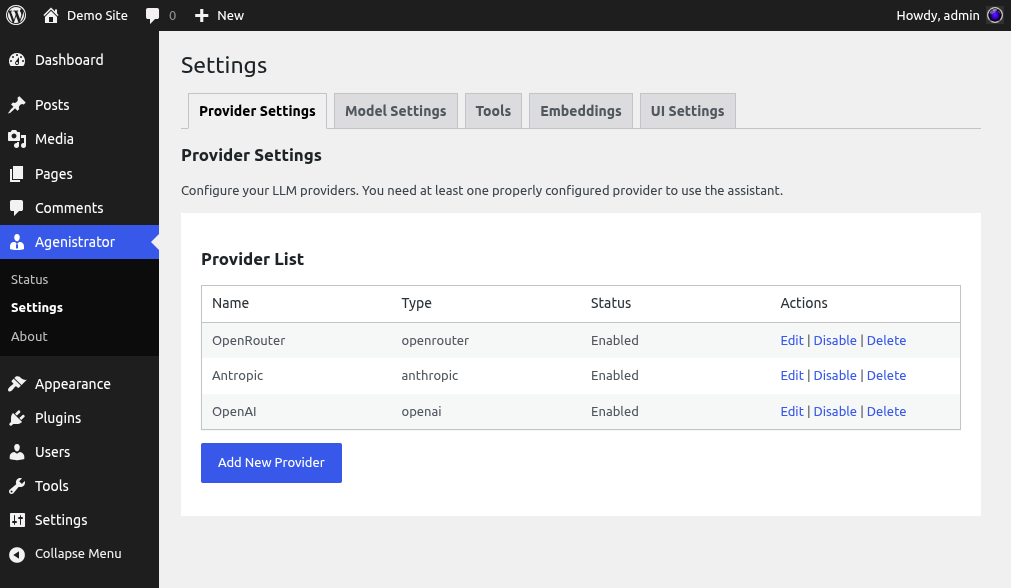
Provider settings with multiple LLM providers configured
Getting API Keys
| Provider | Where to Get Key |
|---|---|
| OpenRouter | openrouter.ai/keys |
| Anthropic | console.anthropic.com/settings/keys |
| OpenAI | platform.openai.com/api-keys |
Select a Chat Model
After adding a provider:
- Go to the LLM tab in Settings
- In the Chat Model dropdown, select a model
- Click Save
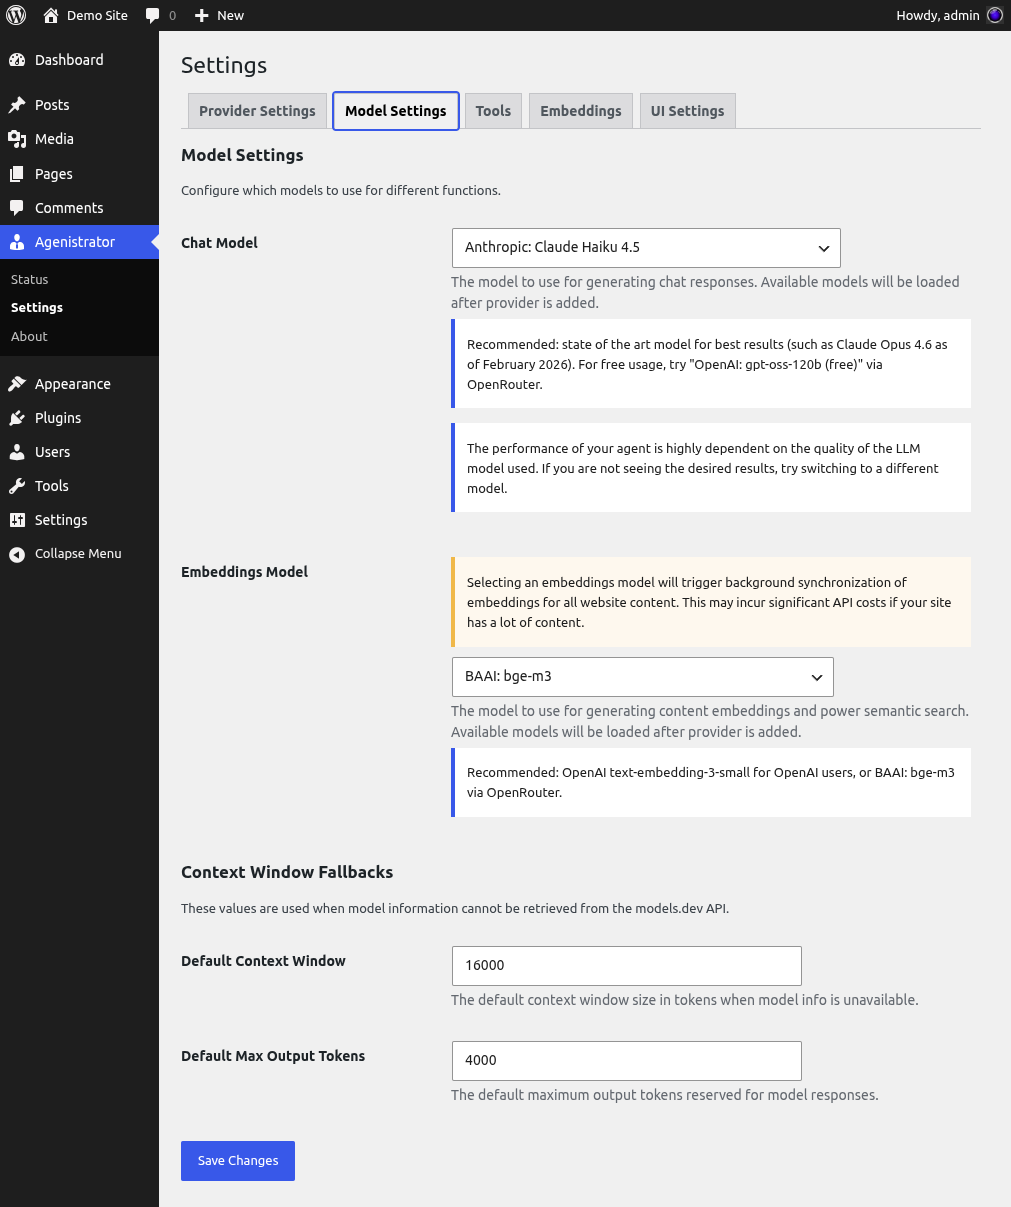
Model selection for chat and embeddings with context window settings
Default Models
Each provider has a sensible default that balances cost and capability:
- OpenAI:
gpt-4o-mini - Anthropic:
Claude Haiku 4.5 - OpenRouter:
OpenAI: gpt-oss-120b- Free tier (good for trying things out)
For state-of-the-art models, check the LLM Arena Leaderboard.
Start Chatting
- Click the chat icon in the bottom-right corner
- Type a message like “What plugins are installed?”
- Press Enter or click Send
- Watch the LLM respond in real-time!
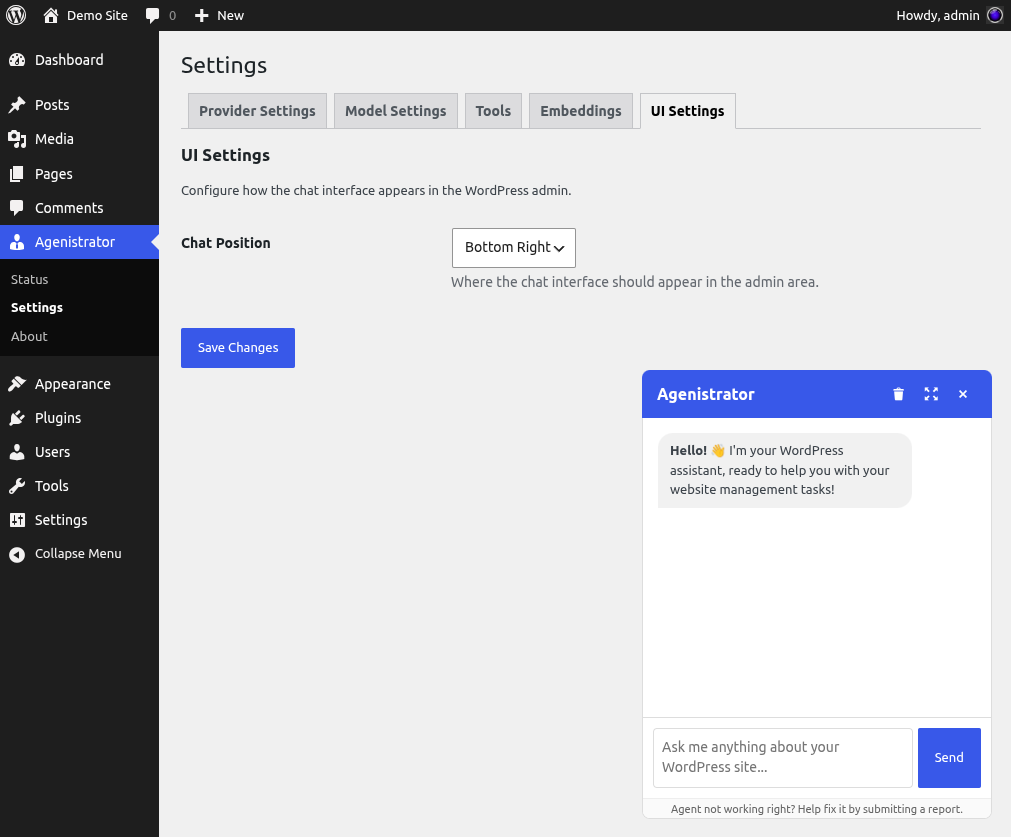
UI settings with chat position selector and the floating chat widget
What’s Next?
- Learn about LLM Providers - Configure multiple providers
- Explore Features - Discover what Agenistrator can do
- Read the FAQ - Get answers to common questions